Legal Tech
Don't miss your chance to get up to speed on the latest and greatest Neos features
Legal TechOctober 23, 2022
Temperatures are dropping outside, but this sizzling October release will keep you toasty. If you missed our latest quick ’n’ dirty feature review webinar, “New in Neos in 19 Minutes,” hosted by Assembly’s head of education, Bryan Billig, you can watch it on demand.
The October release includes:
Features
Mailchimp Integration (customer request)
Enhancements
Improvements
Keep your clients engaged with automatic bulk marketing communications that leverage the Neos Mailing list and the new Mailchimp Integration. You will need a Mailchimp account to access this feature. To activate, go to Settings, then Integrations, and look for Mailchimp.
How to use it
Bulk create invoices across multiple cases that represent all billable and yet-to-be-billed Value records. You can also select, approve, deny, and download invoices in bulk and have the option to filter by primary staff, “bill to,” date range, include time/fees (Y/N), and/or include costs (Y/N).
How to use it
Bulk generate an invoice
In the Invoices section under the Accounting tab, click Generate Invoices to see all cases with outstanding value items for which no bills have been created (Neos defaults to the last 30 days). Select your desired items and click Generate to create the invoices. (Note that if there are multiple "bill to's,” an invoice will be generated for each “bill to.”)
Bulk approve/deny invoice
Select or multi-select invoices in the “pending” state, then hit Approve or Deny.
Bulk download invoices
Select or multi-select invoices in any state and click Download.
Now you can log into Neos using your Office 365 email and password. The option to use your Microsoft login information will appear as part of the regular Neos login screen.
.png)
IMPORTANT NOTE: An email must be saved to each staff profile to allow users to log in with this method.
You can now track disbursements related to a settlement in a new settlements tab. It provides a way to see aggregate value entries through collapsible sections, allowing you to choose what you’d like to display.
Navigate to the Value section of a case and add an item using a Value Code with a "Settlement Amount" value type. On the Settlement section tab, you’ll see each category (Attorney Fees, Due to Firm, Due to Others, Due to Client) with a total outstanding amount due based on the Value items. Use the "+ New Settlement" button to add new Value items in each category that will be disbursed from the Settlement.
Value notes now have the full functionality of case notes. This also means that when you add value notes, those notes will be available in both the Value detail screen and the list of case notes. The Notes tab will also display a new tab for value type notes, and all notes added through the Value screen will be listed under this tab. This will allow you to print a value note, maximize screen size for notes in the Value tab entry, and go from a value note right to the Value screen.
IMPORTANT NOTE: Due to this change, the legacy reports "Audit of Value Notes" and "Text Search within Value Notes" no longer exist. You’ll be able to use Advanced Search to build new reports with value notes.
You can now easily identify your Case/Intake Calendar items that are unlinked to Outlook and identify Calendar items that you don't have “Edit” permissions for.
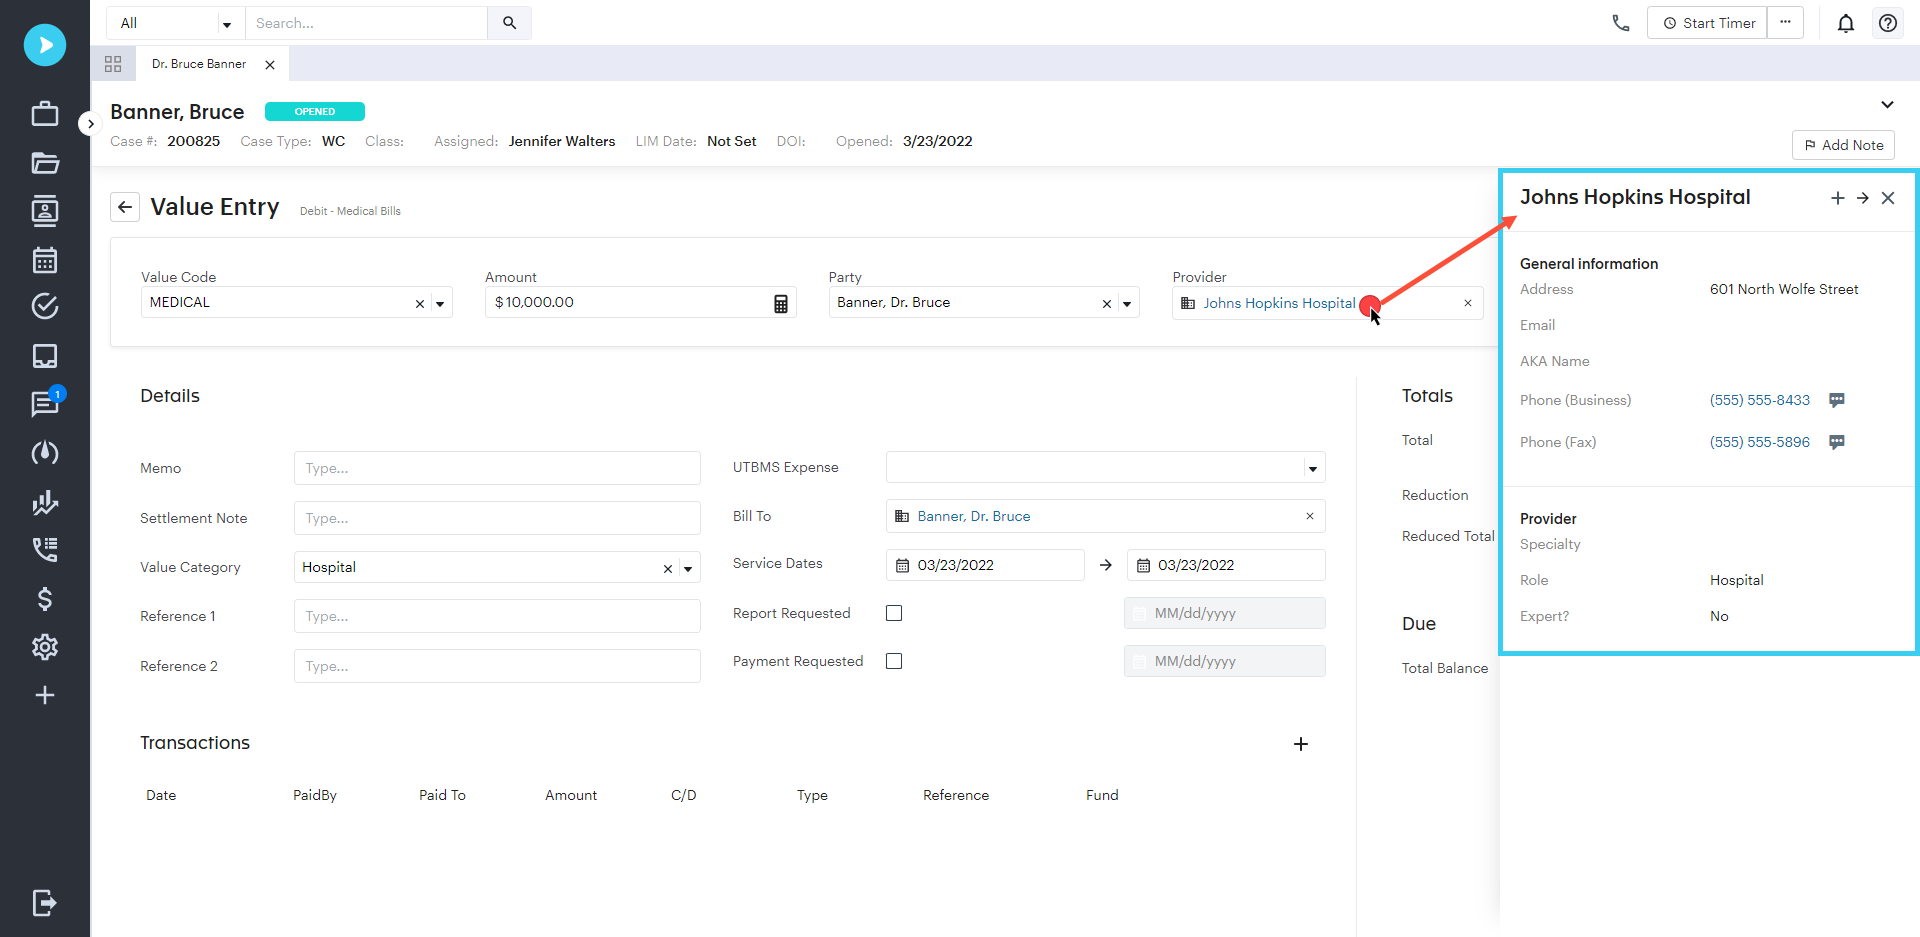
We reintroduced the ability to open the Provider side pane from the Value screen. You can now click to dial directly from the Provider side pane.

We have merged Case, Provider, and Value note topics into a single Note Topics mini directory. Since the user experience is now the same for all notes, it helps to have the same topic of notes everywhere and improves the efficacy of reports.
IMPORTANT NOTE: Due to this change, it will no longer be possible to create user-defined case fields using the Provider or Value Note Topics mini directories. Existing fields of these types will be redirected to the Note Topics mini directory.
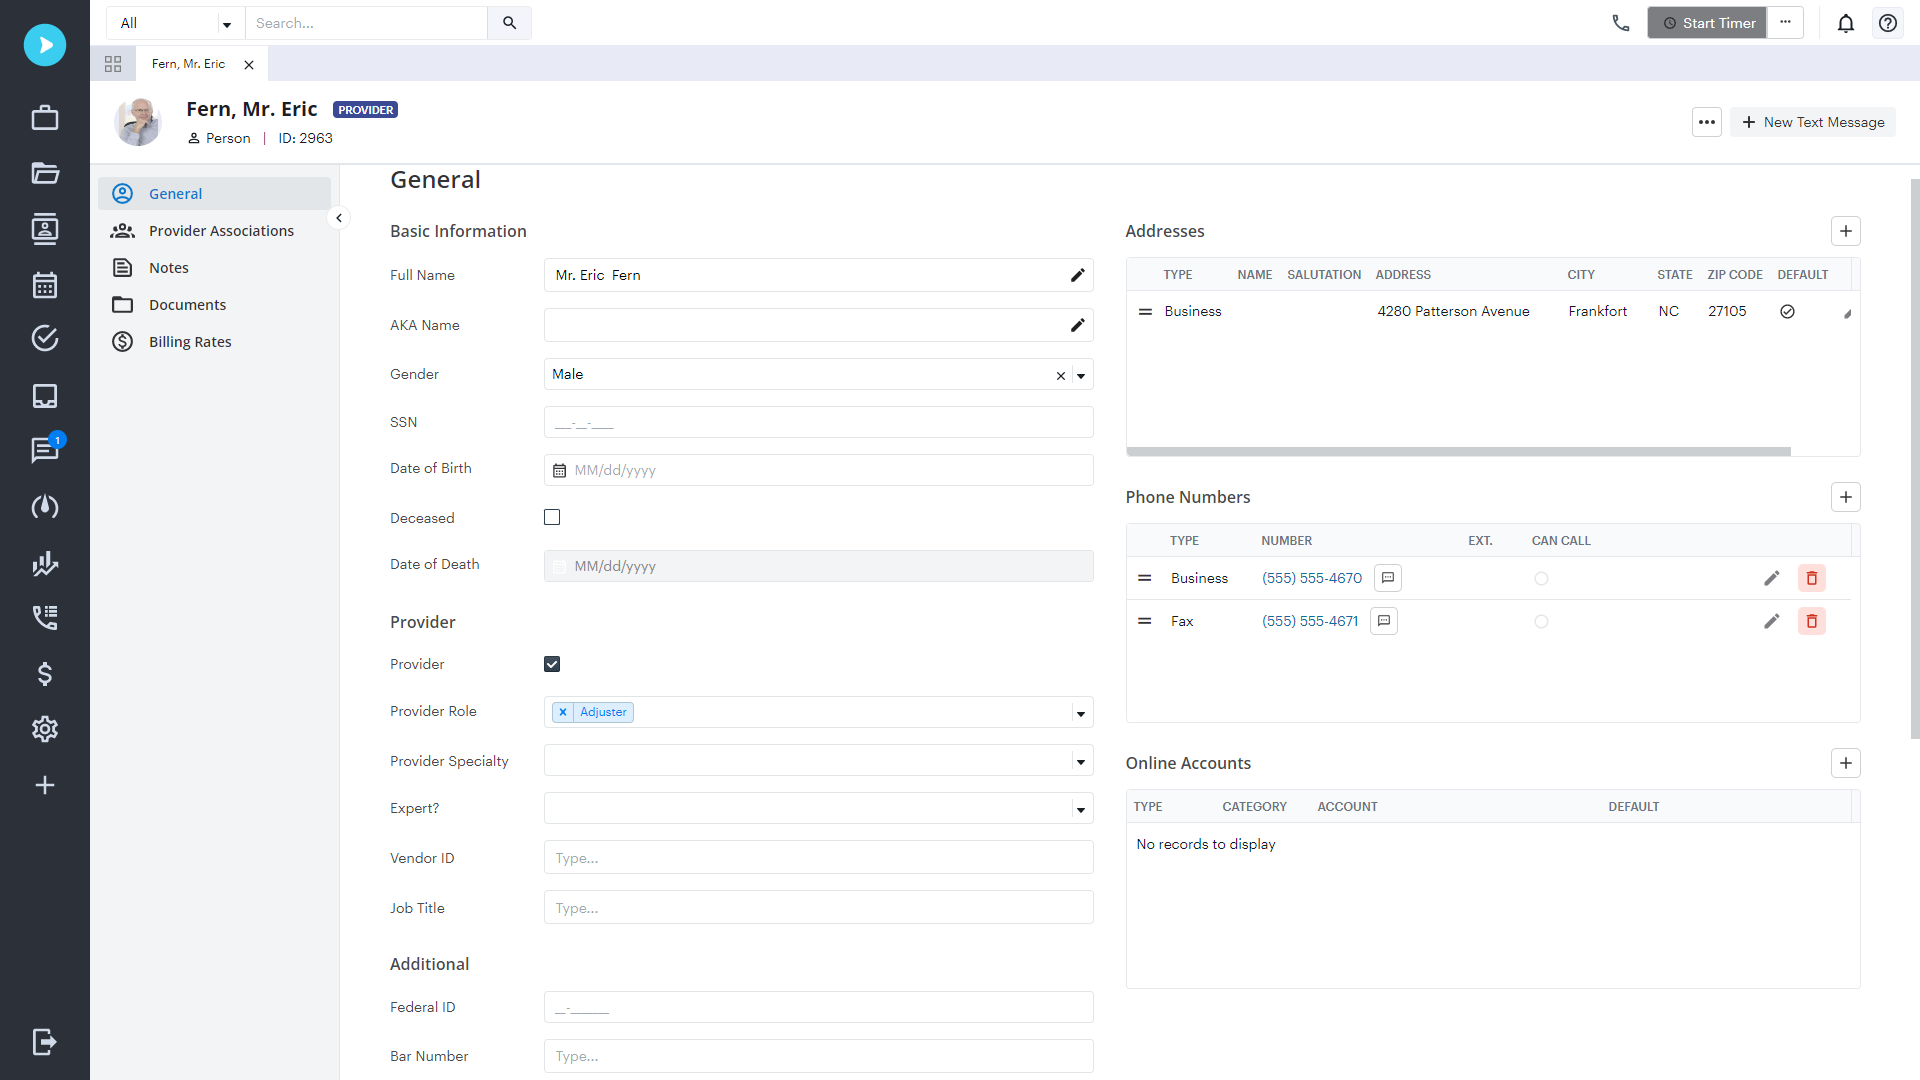
We’ve reorganized the Provider detail screen by showing critical information in one column and addresses, phone numbers, and online accounts in another column.

Contact your customer success manager if you have questions about this release, or sign up for one of our monthly Neos demos for a full product refresh!
For detailed instructions on these enhancements, click the Help icon (question mark) in Neos to access the Self-Serve Portal and Knowledge Base.
SHARE
.png?width=2559&height=1638&format=png&quality=90)